
Reflexion Total Control End User Guide
Please take a moment to record your username and password here:
Your Username:
Your Password:
Your username will always be your email address. When you first log in, you can check “Remember me” so that you will not need to re-enter in your credentials unless you clear your cookies.
If you forget your password, click “Forgot your password?” You will be prompted to enter your email address, and instructions will be mailed to you.
Watch the video or scroll down for step by step instructions.
Your Home Screen
Your administrator has taken the time to set up your account options. The first screen that you will see when you log in is your home screen.
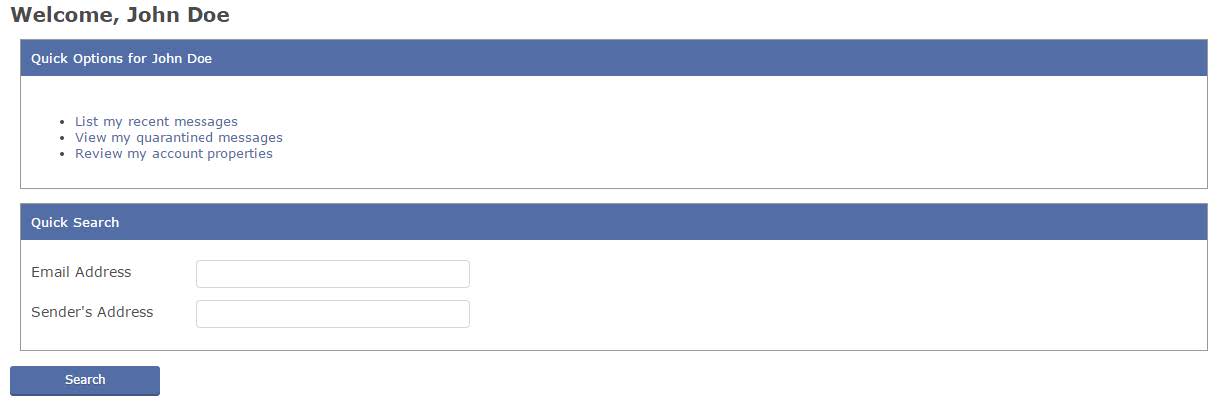
From this screen, you can view recent mail messages, access your quarantine, and review and make changes to your account. Before making changes to your account, please contact your system administrator, as they may have specific guidelines for you to follow.
Security Settings
Please consult with your administrator before making any changes to your default settings.
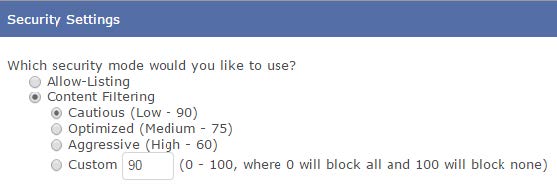
When the Allow-Listing option is selected, the server determines whether or not to deliver each message strictly on the basis of the associated from and to addresses. Only sender addresses that are found on your allow list will be delivered. If a first-time sender (who is not on your allow list) tries to send an email message to your address, the message will be considered spam and will be treated as such based on the spam handling settings in the next section.
Content Filtering mode is the default setting. The system will scan and score the content (looking for things such as suspicious words, phrases, or images) of each email message to determine whether or not the message is spam. Messages that score above the selected threshold will be quarantined.
Content filtering is not as reliable as allow listing but it can be adopted right away because it does not require you to build a list of allowed senders in order to receive email. When you reply to a message received while in Content Filtering mode, the recipient will be added to your allow list. This lets you to start out in Content Filtering mode and then transition into Allow-Listing mode once your allow list has been built up sufficiently.
How to Handle Messages Marked as Spam
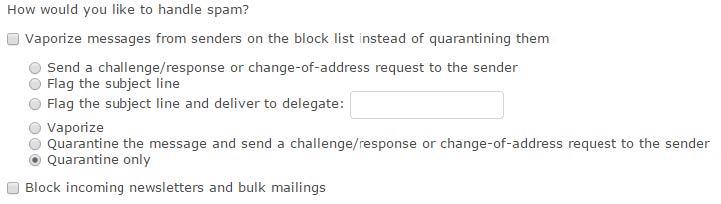
Send a challenge/response or change-of-address request: Spam is not delivered to your mailbox. Instead, either a challenge/response message or a change-of-address request is sent back to the sender.
The challenge/response message indicates that the sender’s message was blocked, and provides them with a link to add their address to the allow list. The change-of-address message indicates that your email address has changed, and provides a unique protective address for the sender to use for all future communications.
Flag the subject line: Instead of being blocked or quarantined, questionable messages will be delivered to your mailbox with “**Possible Spam**” inserted at the beginning of the subject line. This setting should be selected to avoid missing any legitimate email.
Flag the subject line and deliver to delegate: You can appoint someone within your organization to receive all questionable messages. Enter their email address in the form field.
Vaporize: Delete questionable messages with no notification at all.
Quarantine and send a change-of-address request: Same as “Send a challenge/response or change-of-address request” but the message is also quarantined.
Quarantine only: The message is quarantined and no immediate notification is sent to the sender or recipient.
Additional Account Settings
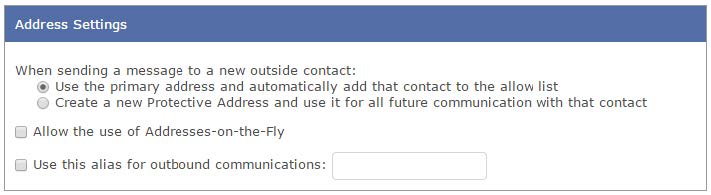
Use the primary address and automatically add that contact to the allow list: The message will appear to come from your primary address (e.g. you@example.com) and the recipient will automatically be added to your allow list.
Create a new Protective Address and use it for all future communication with that contact: The message will appear to come from a Protective Address (e.g. user.anything123@example.com) and all future communications with that recipient will use that same Protective Address.
Additionally, messages sent to that Protective Address by that contact will not screened by the content filter, so they’re significantly less likely to be incorrectly identified as spam.
Allow the use of Addresses-on-the-Fly: AOTF is a unique feature that enables you to give out email addresses safely. If you want to buy something on eBay, for example, you can submit: you.ebay@example.com; messages sent to this address will always get through to you unless you block them. You can also do this when you’re on the phone with a client: you.client@example.com, for instance.
Messages to AOTFs are not screened by the content filter, so they are significantly less likely to be incorrectly identified as spam. If unwanted messages result from disclosing an AOTF address, you can stop the original sender from sharing the AOTF address, block the sender’s address completely, or disable the AOTF address altogether.
You gain control of your corporate email to ensure all your messages get through without any unwanted messages in the mix. If you are unsure what to choose for this option, feel free to enable it. It will not affect normal email usage in any way.
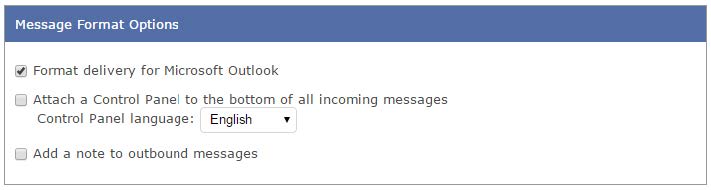
Attach a Control Panel to the bottom of all incoming messages: This option causes a control panel footer to be attached to all incoming messages. The footer allows the recipient to see why the message came in, which address it was sent to, and provides an easy way to add the sender to the block list or allow list or to disable the address with only a few clicks.

Send a quarantine summary: You will receive a summary of all messages added to the quarantine. Links in the daily quarantine summary can be used to allow and release messages directly to your email client.
Blatant spam threshold: Messages whose content filter scores are above this threshold will not be included in the daily quarantine summary, though you can still view them on the web-based quarantine page.
Always send a quarantine summary: Sends a quarantine summary even if no new messages have been added to the quarantine since your last quarantine summary.
Partially block quarantine message subject lines: Parts of each quarantined message’s subject line are replaced with ‘—‘ in order to shield you from the potentially offensive language often seen in spam emails. E.g. “Sample email subject” would become “S—– e—– s——“.
Your Quarantine Folder
To view blocked messages, click on Quarantine in the menu bar or click “View my quarantined messages” from your home screen. Either option will bring you to a page that looks similar to this:
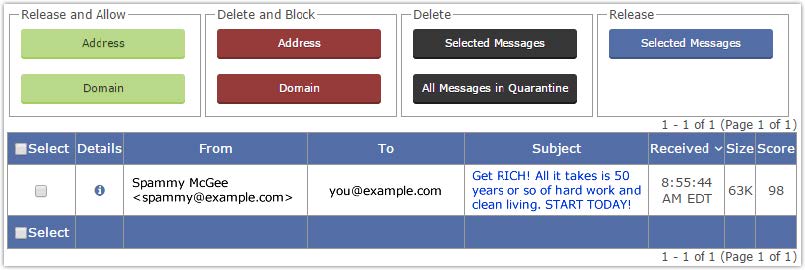
Clicking on the subject line of a message will open up the message. From that page, you can…
- Release the message to your inbox
- Release the message and allow the sending address or sending domain
- Delete the message and block the sending address or sending domain
- Delete the message
You can also check the boxes next to several messages and perform the above tasks in bulk. Please note the following:
- If a quarantined message contains an attachment, you will need to release the message first in order to view the attachment.
- Once a message is deleted from the quarantine, it can’t be recovered.
- When allowing or blocking an address, you’re blocking the address in the “From” column, as that is the actual sending address.
Common Tasks
How to add email addresses/domains to your allow list or block list
- In the menu bar, click User > Allow List (or Block List)
- Click Add Allow-List (or Block-List) Entry
- Enter a single email address (sender@example.com) to allow or block that sender
- Enter a domain (example.com) to allow or block all senders from that domain
You can also click Import to add multiple addresses or domains at once.
How to use inbound subject filtering
- In the menu bar, click User > Subject Filtering
- Choose to use your current spam settings or to vaporize filtered messages
- Select Add Filter to add the subject filter
- Select DELETE SELECTED FILTER(S) to remove entries
How to add an alias
- In the menu bar, click User > Addresses > Add New Alias
- Your new alias will resolve to your primary address; you can also choose to make the new alias your primary address instead
How to enable permitted languages
- In the menu bar, click User > Permitted Languages
- Your enterprise administrator may already have permitted languages in place; you can add your own additional languages as well
- Incoming messages in languages other than those permitted by you or your enterprise will be blocked and placed into the quarantine
How to enable permitted countries
- In the menu bar, click User > Permitted Countries
- Your enterprise administrator may already have permitted countries in place; you can add your own additional countries as well
- Incoming messages from countries other than those permitted by you or your enterprise will be blocked and placed into the quarantine
How to change your password
- In the menu bar, click User > Password
- Follow the on-screen directions to ensure your new password meets security requirements
How to view delivery results for sent and received messages
- In the menu bar, click User > Reports > Recent Messages > All
- You will see all the messages sent to and from your address; click on the icon in the Details column of each message for more information and options